VeraCrypt is a free, open-source encryption tool available for all versions of Windows. Here’s how to create and use an encrypted VeraCrypt volume in Windows to encrypt and protect your files on any static or removable drive.
What Is VeraCrypt?
A fork of the now defunct TrueCrypt, VeraCrypt plugs all known security holes in TrueCrypt and improves upon TrueCrypt’s weak encryption methods. VeraCrypt is also backwards compatible with TrueCrypt volumes.
VeraCrypt creates encrypted volumes for securely storing files. It also allows you to encrypt entire system drives or partitions.
We’re looking at the Windows version here, but if you use macOS or Linux, there’s a version of VeraCrypt for you too. To get started with this free tool, head to veracrypt.fr to download and install VeraCrypt. Be sure to accept the default settings during installation.
How to Create a VeraCrypt Volume (File Container)
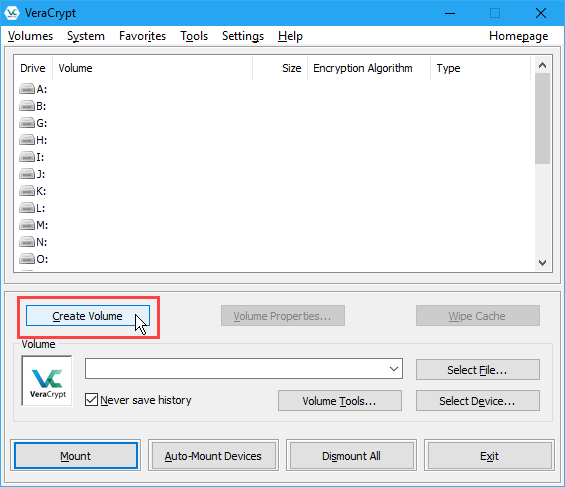
To create a VeraCrypt Volume, open VeraCrypt and click Create Volume.
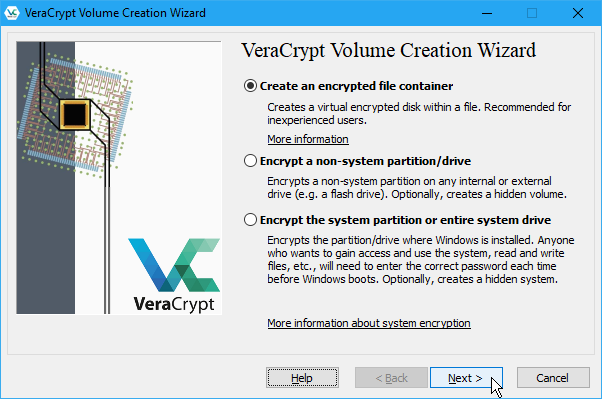
On the VeraCrypt Volume Creation Wizard, select the type of volume you want to create. We’re going to create an encrypted volume to store private files, so we accept the default option, Create an encrypted file container.
You can also encrypt a non-system drive or partition, or encrypt the system partition, or entire system drive. To learn about these options, click the More information about system encryption link.
Click Next to proceed.
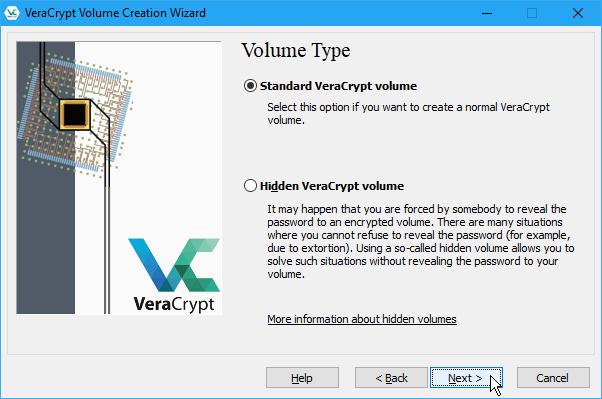
The default Volume Type is a Standard VeraCrypt volume, which we are going to use for our example.
If you’re concerned that you might be forced by someone to reveal your password, you can also choose to create a Hidden VeraCrypt volume. Learn more about hidden volumes by clicking the More information about hidden volumes link.
Click Next.
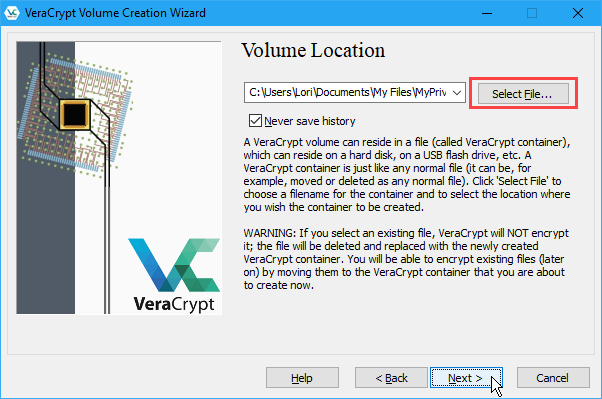
On the Volume Location screen, click Select File. Then, use the Specify Path and File Name dialog box to enter a name and choose a location for the VeraCrypt volume file.
When you installed VeraCrypt, one of the default settings was to associate .hc files with VeraCrypt so you can double-click on a volume file to load it in VeraCrypt. To take advantage of this feature, be sure to add “.hc” to the end of your file name.
If you want the Volume Location dropdown list to contain a history of VeraCrypt volumes you attempted to mount, uncheck the Never save history box. This allows you to select a volume from the list instead of using the Select File button. But this also provides easy access to your volumes and shows their locations to others who might get access to your computer.
Once again, click Next.
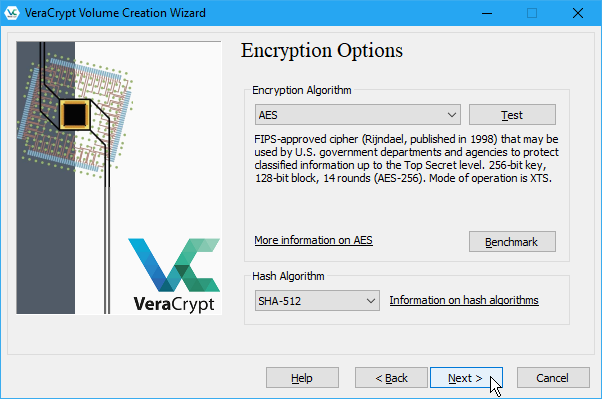
On the Encryption Options screen, choose an Encryption Algorithm and Hash Algorithm. The default algorithms for both are secure options, if you’re not sure what to use.
Click Next.
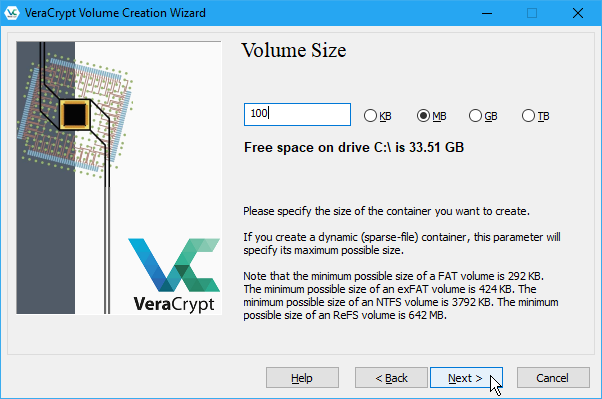
Enter the size you want for the VeraCrypt volume in the edit box and select whether that size is in KB, MB, GB, or TB.
Move onto the next screen with Next.
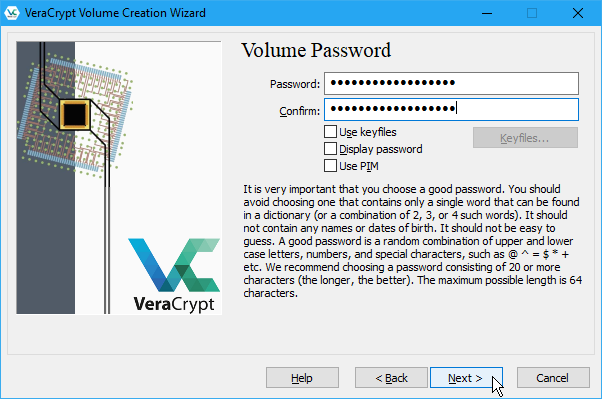
Choose a strong password for your volume and enter it in the Password box, and again in the Confirm box.
Keyfiles add extra protection to your volume. For our example, we’re not going to use keyfiles, but you can read more about them in VeraCrypt’s help if you decide to use them.
If you enter 20 characters or less for your password, you’ll see a warning dialog telling you short passwords are easy to crack using brute force. Click No to return to the Volume Password screen and enter a longer, more secure password.
The Next button is only available once you’ve entered the same password in both boxes.
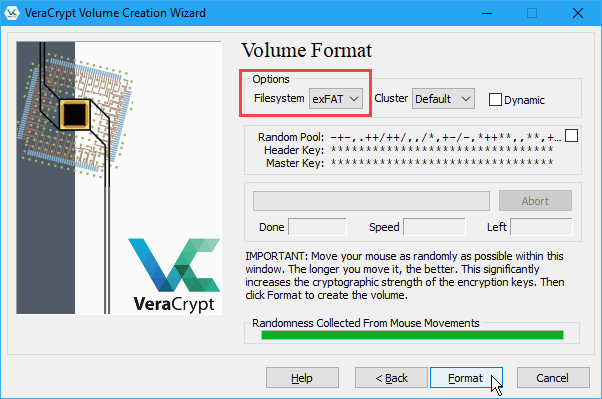
On the Volume Format screen, select the type of Filesystem you want to use. If you’re going to access the volume on macOS or Linux, in addition to Windows, you should select either FAT or exFAT.
Leave Cluster as Default and Dynamic unchecked.
Move your mouse randomly over the Volume Format screen until the progress bar under Randomness Collected From Mouse Movements at least turns green. But the more you move the mouse, the stronger the encryption on the volume.
Then, click Format.
If the User Account Control dialog box displays, click Yes to continue.
VeraCrypt creates the volume file in the location you specified. This may take a while, depending on the size of your volume.
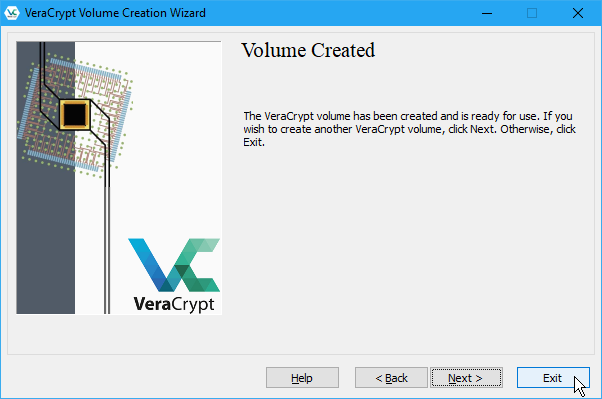
Click OK on the dialog box that displays when the VeraCrypt volume has been successfully created.
On the VeraCrypt Volume Creation Wizard dialog box, click Next if you want to create another volume. Or click Exit to close the wizard.
How to Mount a VeraCrypt Volume
Now that we’ve created our VeraCrypt volume, we need to mount it to use it.
On the main VeraCrypt window, select an unused drive letter you want to use for your volume. Check File Explorer to see which drive letters are currently being used, and avoid using them.
Then, click Select File. Use the Select a VeraCrypt Volume dialog box to navigate to and select a VeraCrypt volume file.
If you accepted the default setting during installation that associated .hc files with VeraCrypt, you can also use File Explorer to load the VeraCrypt volume. Go to where you saved the VeraCrypt volume file and double-click the file.
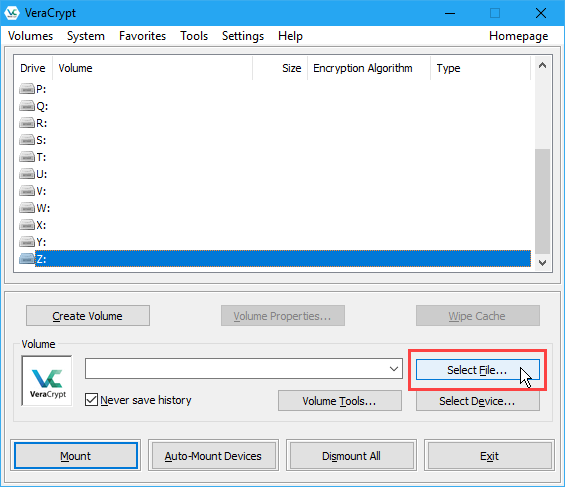
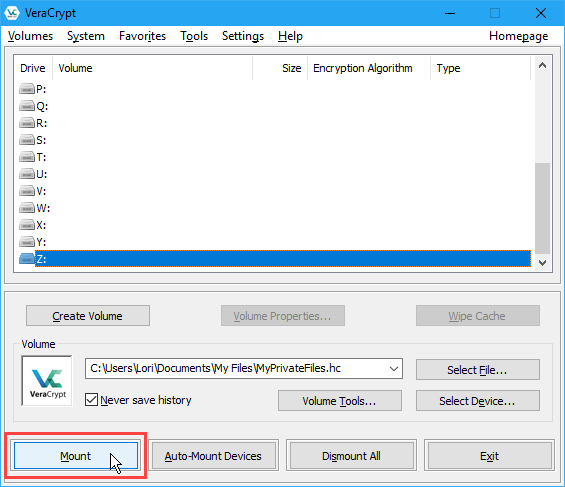
The path to the VeraCrypt volume file displays in the dropdown list box.
Click Mount.
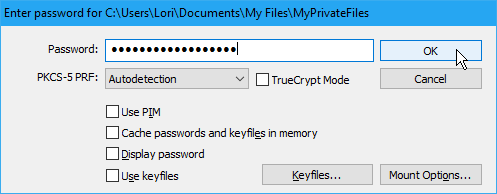
Enter your Password. If you remember the Hash Algorithm you selected when you created the volume, select it from the PKCS-5 PRF dropdown list. If not, don’t worry. You can use the default of Autodetection. It just might take a bit longer for the volume to decrypt and mount.
If you used one or more keyfiles when you set up your volume, make sure you check the Use keyfiles box. Then, click Keyfiles and select the same file(s) you used when creating the volume.
Click OK.
A progress dialog box displays while the VeraCrypt volume is decrypted. Depending on how big your VeraCrypt volume is, this may take a while.
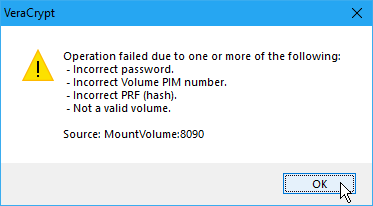
If you entered a wrong password or forgot to select your keyfiles (if you used them when creating the volume), you’ll see the following error dialog box. Click OK to go back to the Enter Password dialog box and enter the correct password and select the correct keyfiles, if you used them.
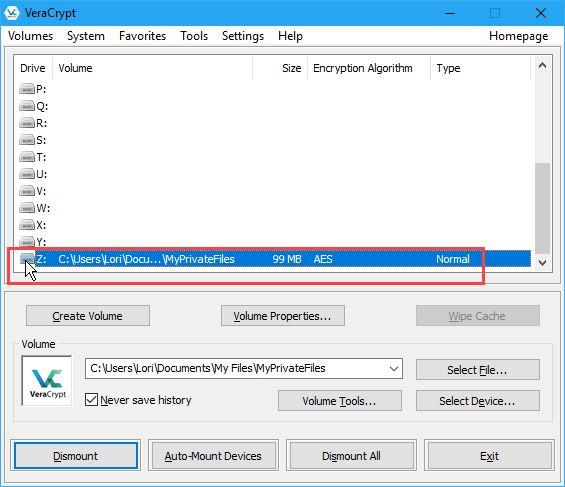
Once the volume is successfully mounted, you’ll see it next to the drive letter you selected, as a virtual disk assigned that drive letter.
To access the volume, double-click on the drive letter in VeraCrypt.
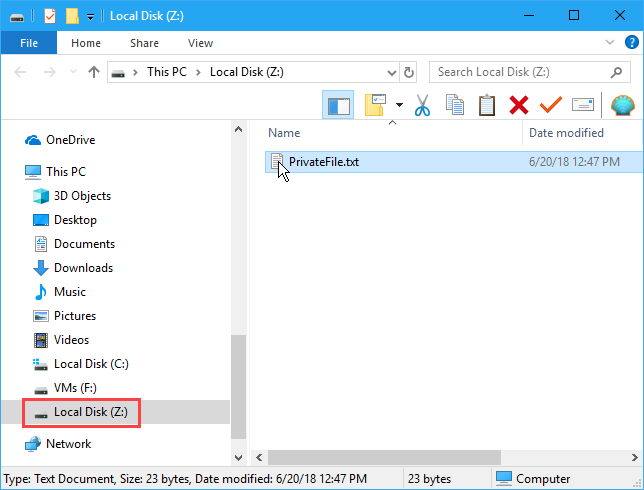
You can also browse to the mounted volume in File Explorer the way you normally browse to any other type of drive. For example, we mounted our VeraCrypt volume using the drive letter Z: and it shows up with that drive letter in File Explorer.
VeraCrypt never saves any decrypted data to disk—only in memory. Data is encrypted in the volume even when mounted. As you work with your files, they are decrypted and encrypted on the fly.
How to Dismount a VeraCrypt Volume
When you’re done working with the files in your VeraCrypt volume, you can close, or dismount, the volume.
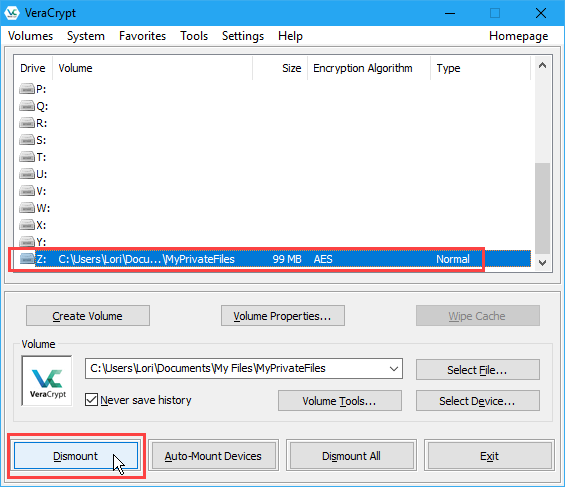
Select the volume you want to dismount in the list of drive letters. Then, click Dismount.
VeraCrypt removes the volume from the drive letter list. When a volume is dismounted, you can move the .hc file anywhere you want. You can back it up to an external drive. Or you can store it in a cloud service like Dropbox, Google Drive, or OneDrive so you can easily access it on another computer.
Start Using VeraCrypt to Encrypt Your Private Data
Computers play an integral part of daily life and any sensitive data stored on them (and in the cloud and on external media) must be secured.
VeraCrypt is an easy and reliable way to secure and encrypt your most sensitive data.
Image Credit: AleksVF/Depositphotos
Read the full article: How to Encrypt and Protect Your Data and Files Using VeraCrypt
from MakeUseOf https://ift.tt/2KkdR4b
via IFTTT

0 comments: