If you spend a lot of time in front of your computer screen, chances are you suffer from a certain degree of computer eye strain. Fortunately, there are a few settings you can change in Windows 10 to mitigate the impact of a bright screen on your eyes, and one of those settings is Dark Mode.
What Is Dark Mode in Windows 10?
Dark Mode, not to be confused with Night Light which adds a warm red hue to your screen, allows you to opt for a dark background on certain Windows 10 apps. Night Light is meant to help your sleeping patterns, while Dark Mode is more about easing eye strain.
Dark Mode affects only certain Windows 10 native apps, such as the Settings window and Microsoft Store. Several other apps and programs, including Microsoft’s own File Explorer and Edge browser, aren’t affected by Dark Mode.
To enable Dark Mode manually, you can go to Settings > Personalization > Colors and under Choose your default app mode, select Dark.
But what if you only want Dark Mode at night and don’t want to manually toggle it on and off every day? The good news is, you can automate it using nothing more than the built-in Windows 10 Task Scheduler.
How to Automatically Enable Dark Mode at Night
- Type Task Scheduler in the Windows 10 search bar and open the program.
- In the program menu click Action > Create Basic Task.
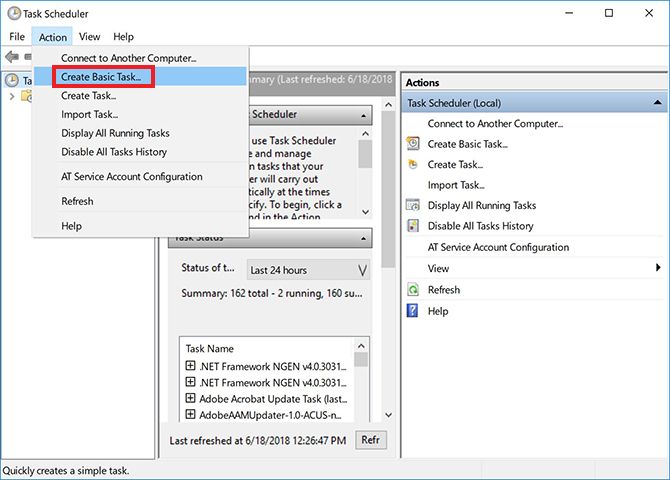
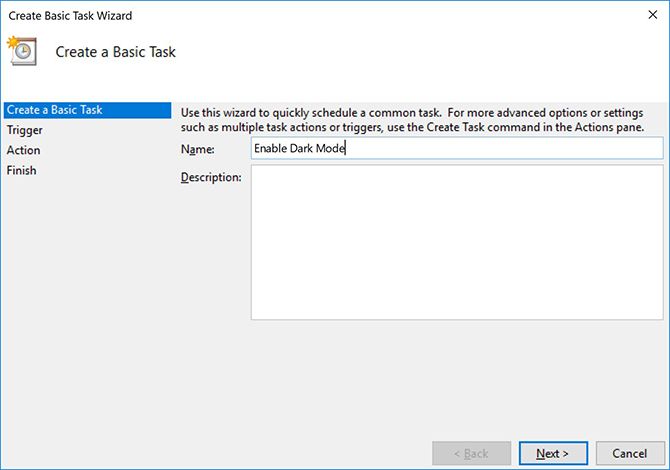
- Enter a name for the task (I went with Enable Dark Mode) and click Next.
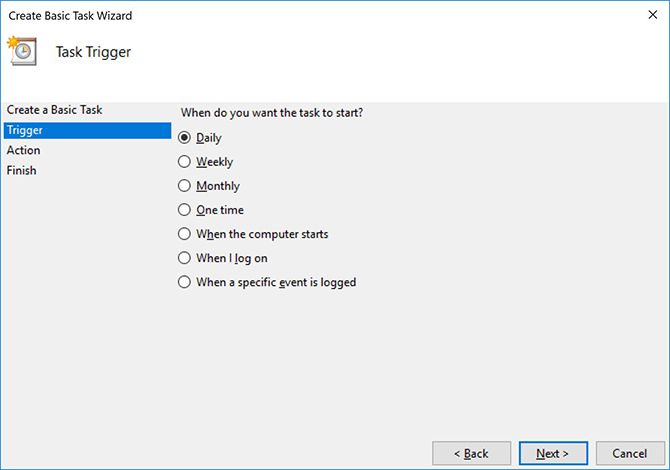
- For When do you want the task to start?, select Daily and click Next.
- Leave the start date as is, and fill in the time you want Dark Mode to be enabled and click Next. (If you tend to travel with your laptop, make sure that Synchronize across time zones is checked.)
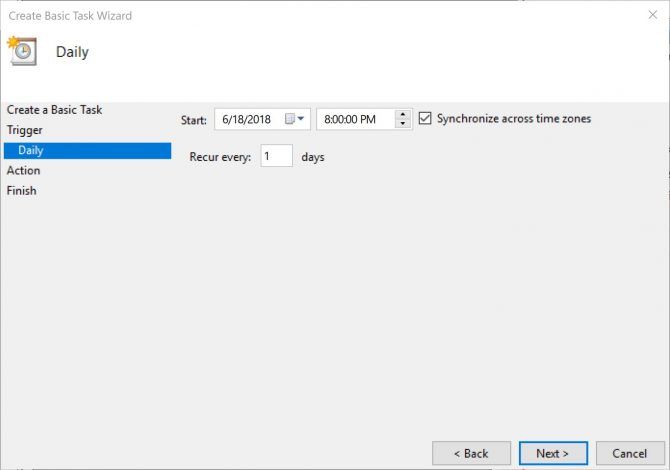
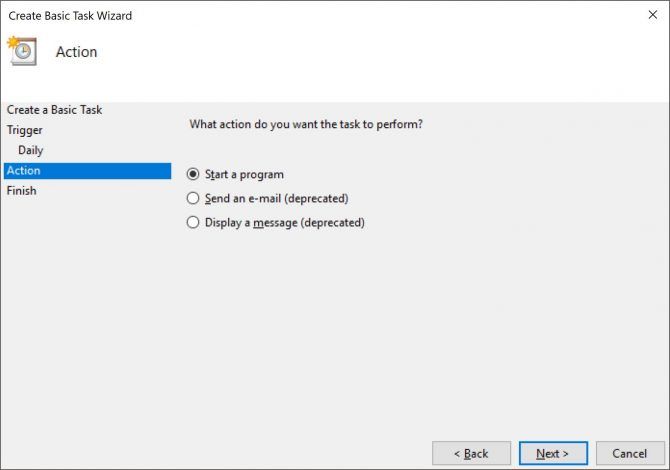
- For the Action select Start a Program and click Next.
- In the Program/Script field type Reg. In the Add arguments field, copy and paste the following and click Next:
add HKCU\SOFTWARE\Microsoft\Windows\CurrentVersion\Themes\Personalize /v AppsUseLightTheme /t REG_DWORD /d 0 /f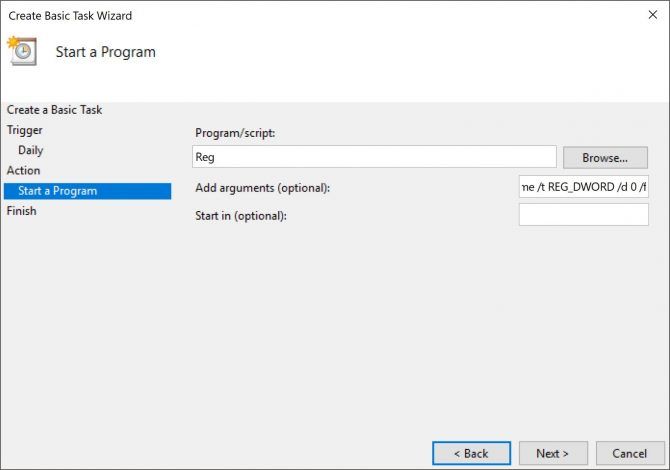
- Click Finish.
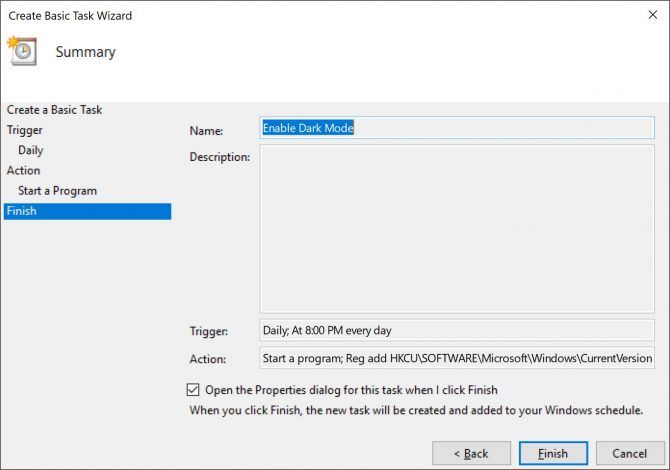
If your computer is turned off at the time that you chose, Dark Mode will not be enabled unless you do the following, make sure that Open the Properties dialog for this task when I click Finish is checked.
In the dialog box that opens, go to the Settings tab and check Run task as soon as possible after a scheduled start is missed. This way the task will run as soon as you turn on your computer, enabling Dark Mode after the fact.
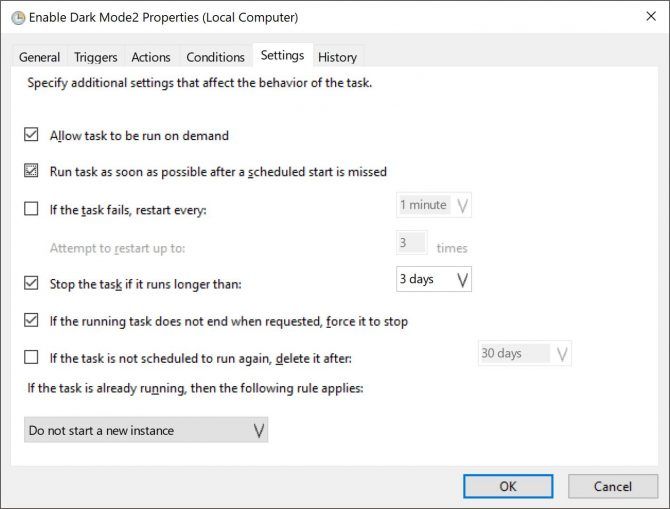
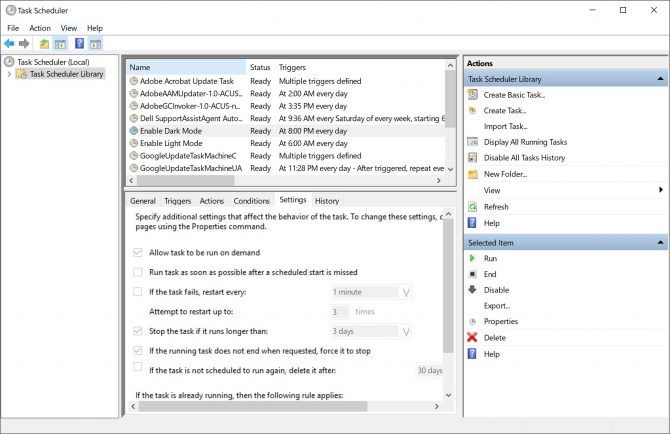
You can revisit these settings by opening the Task Scheduler and clicking the Task Scheduler Library, and finding the task you want to edit (they’re listed in alphabetical order) and clicking on the Settings tab.
How to Automatically Disable Dark Mode at Daytime
This step is essential if you want your computer to switch back and forth between the two modes. To switch back to Light Mode in the morning, you’re going to have to go through the same steps above, creating a second task, but this time at Step 5 select the time in the morning you want to enable Light Mode.
In Step 7, in the Program/Script field type Reg. In the Add arguments field, copy and paste the following and click Next:
add HKCU\SOFTWARE\Microsoft\Windows\CurrentVersion\Themes\Personalize /v AppsUseLightTheme /t REG_DWORD /d 1 /f
How to Edit or Delete the Tasks
If you change your mind and decide you no longer want to automatically enable Dark Mode, or want to make changes to the settings such as the time it triggers, open up the Task Scheduler and click Task Scheduler Library. After you select your task, you’ll see the option to Delete the task under Actions.
You can test if the task is working by clicking the Run button, and it will instantly switch modes.
Double-click the task and a window will open up in which you can edit all the information you had entered previously. To change the time, go to the Triggers tab and double-click to open the dialog box in which you can edit the time.
To completely darken your Windows 10 experience, you’ll probably want to look into making changes to each Windows 10 app individually.
Read the full article: How to Auto-Toggle Windows 10 Dark Mode at Night
from MakeUseOf https://ift.tt/2t8UUXK
via IFTTT


0 comments: