If you’re new to PC gaming, you might not have ever explored video game graphics settings. Most people know that higher settings are better, but what do all those game settings actually do?
We’re here to explain the most common video game graphics settings. We’ll see how they work and how they affect your system and games.
1. Display Resolution
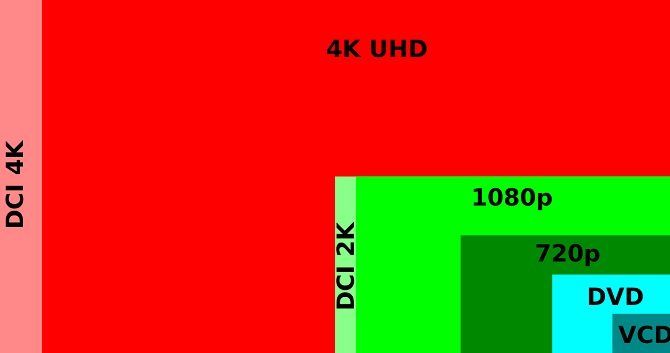
Resolution is the amount of pixels present on your screen, which dictates the overall quality of the image. You’ll see this expressed as two numbers, such as 1920×1080 (1080p) or 2560×1440 (1440p). The first number indicates the width of the screen in pixels, while the second is its height in pixels.
All monitors come with default resolution settings, which you can change. If you have a 1080p monitor, you can display in resolutions lower than 1920×1080, but not higher.
Independent of this, you can change a game’s display resolution. Setting a game to display higher than your monitor can handle is pointless, as you’ll lose the extra detail.
Higher resolutions bring a noticeable bump in image quality because there is more graphical information per frame. Of course, increasing the resolution will put more stress on your GPU. Increasing resolution is one of the simplest and largest quality upgrades you can make, so make sure you have a GPU that can handle high resolutions before cranking it up.
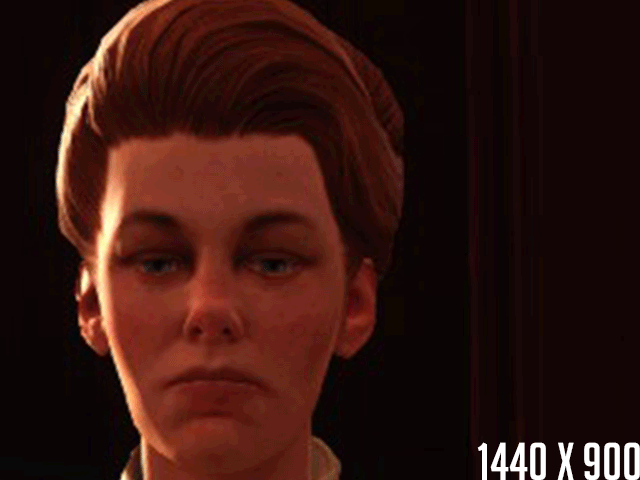
Below are two images, zoomed in 200x. One image was taken at 1440×900 resolution (roughly 720p); the other was taken at 1920×1200 (roughly 1080p). Note the added detail to the hair and lines around the eyes.
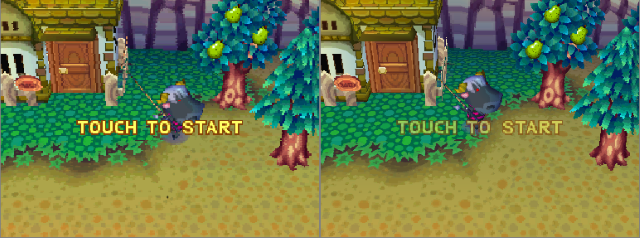
Some games and software tricks use special methods to render output at a higher resolution than is normally possible. For example, the image below shows the Nintendo DS game, Animal Crossing: Wild World.
The left side below displays the regular 256×192 resolution, while the right has the same game using 1024×768 resolution downsampled to the original 256×192 screen. You could achieve this effect using an emulator.
2. Refresh Rate
When you change your resolution in the game settings, you may see another number beside it. This represents the number of frames per second (FPS) the game sends to your monitor. The FPS that your monitor can display is known as the refresh rate, which is measured in hertz (Hz).
Most standard monitors have a refresh rate of 60Hz, which means that they can draw a new image on the screen 60 times per second. Your graphics card (and game) may be capable of sending a higher FPS than your monitor can display. However, your monitor’s refresh rate effectively acts as a cap on your game FPS, as a 60Hz monitor can’t display 144 frames per second.
60FPS is the generally accepted standard for smooth gaming. A higher refresh rate will produce smoother-looking images, which is more taxing on your GPU. If you’re not sure, you can check your monitor’s refresh rate at UFO Test. We’ve explained how to fix low FPS in Windows if you’re not satisfied with your results.
3. Texture Quality
Texture quality is just what it sounds like: how good elements of the in-game environment look. Textures are skins that sit on top of the basic blocks of the three-dimensional environment.
Increasing the texture quality will enhance the quality of the game’s graphics. Doing this is often rather intensive, as a texture quality change will usually adjust all the textures in-game. The results are sharper and less blurry images at the cost of a heavier load on your video card.
For example, a photograph on the wall might look blurry and indistinguishable on Low texture settings, but have enough detail to study clearly on High. See the below comparison of a shot in BioShock Infinite for an example:
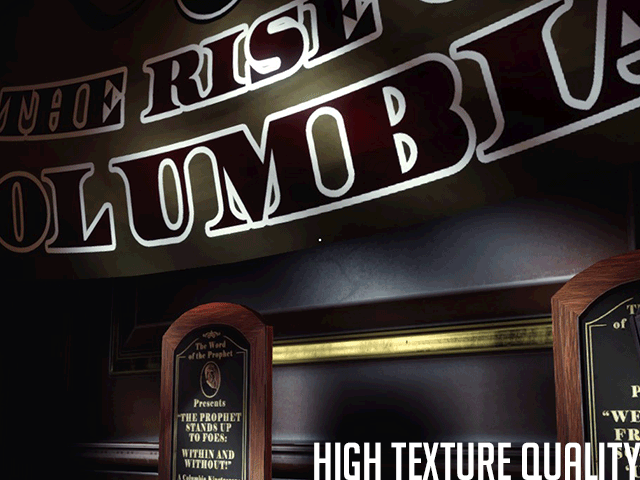
All quality settings work in a similar fashion, so we won’t go over them individually. This includes shader quality, which adjusts how clear light and dark balance in the game.
The particular enhancements made through quality bumps are difficult to pinpoint, since they vary from game to game. You can typically adjust a single slider on levels like Low, Medium, and Ultra, or dive into advanced settings and tweak everything individually if you prefer.
For general use, medium settings are often a good idea, as they balance an immersive landscape with playable performance.
4. Anti-Aliasing
Before explaining anti-aliasing (AA), it’s helpful to understand what aliasing is in the first place. Aliasing occurs when low-resolution images produce pixelated (rather than smooth) lines and curves. This is a result of using square pixels to represent rounded real-life objects.
Anti-aliasing injects blocks of the same or similar color around the lines of an image, creating a smoother effect. This reduces the blocky look around the edges of items in your game. There are different kinds of anti-aliasing techniques; your GPU’s drivers decide which to use. However, you can often change the quality of anti-aliasing you want in your game options.

Depending on the AA methods used, it may tax the GPU a small or large amount. Try turning up the AA effect if you notice jagged edges all over the place, especially on elements like foliage and grass.
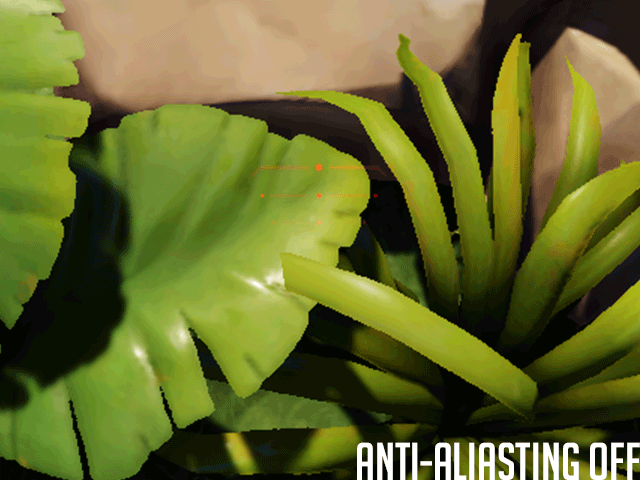
Anti-aliasing is more effective at lower resolutions. At higher resolutions, like 4K, the pixels are so small that any aliasing effect is negligible.
5. VSync
VSync (short for Vertical Synchronization) synchronizes the FPS output of your game with the refresh rate of your monitor in order to prevent screen tearing. Screen tearing (one of the most common PC gaming problems) occurs when your GPU outputs more frames per second than your monitor can handle. Thus, the card sends a new frame before your monitor has finished showing you the previous one.
You can see an example of screen tearing below. Notice how the image is split into three pieces that don’t line up. Although screen-tearing isn’t always obvious while playing a game, you’ll likely notice it if you watch slowed-down playback of recorded games.
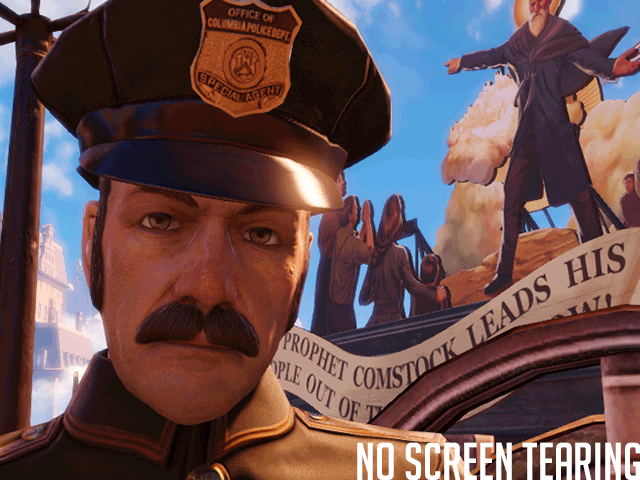
Enabling VSync removes virtually all screen-tearing from your gameplay. However, it has two downsides. The first is that it can introduce input lag, which is when your button inputs don’t immediately take effect in the game.
The other problem is that if the game’s FPS falls below your monitor’s refresh rate, it locks the frame rate to a lower synchronized value, like 30FPS. This can lead to games stuttering unnecessarily—jumping between 30 and 60FPS is much more jarring than just staying at 59FPS.
To deal with this issue, GPU manufacturers have created separate modules for monitors which sync refresh rates dynamically with frame rates. These alternative syncing options, such as Nvidia’s G-Sync and AMD’s FreeSync remove any stuttering associated with VSync.
However, these alternative syncing methods do require a compatible monitor and GPU, which limits the exposure of this innovative technology. In most cases, unless screen tearing really bothers you, you’re better off disabling VSync and enjoying higher frame rates.
6. Tessellation
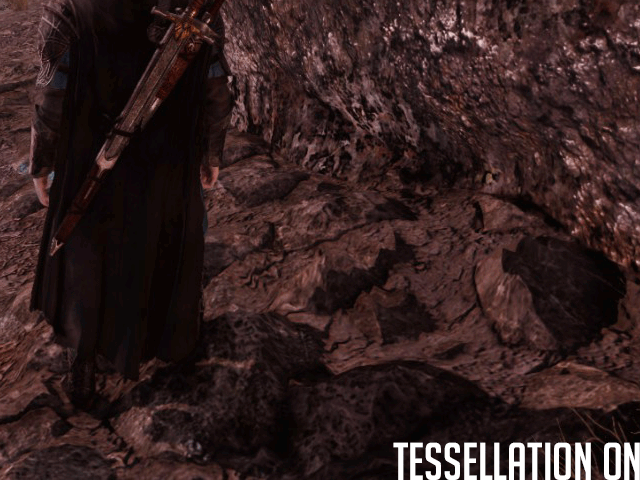
In-game textures are comprised of quads—polygonal shapes made of triangles—which form over the shape of objects. Tessellation allows graphics cards to repeat quads multiple times over any given surface. The repeated patterning allows for texture displacement, which creates bumps in landscapes.
You’ll notice this most clearly when looking at surfaces like brick walls. With high tessellation, these will have realistic bumps and curvatures. Without it, they’ll look smooth and less believable.
In most games, tessellation is not that taxing on your GPU. It’s worth a try to enable it and see if it improves your game without impacting performance, but it’s not the most vital graphical game setting.
7. Ambient Occlusion
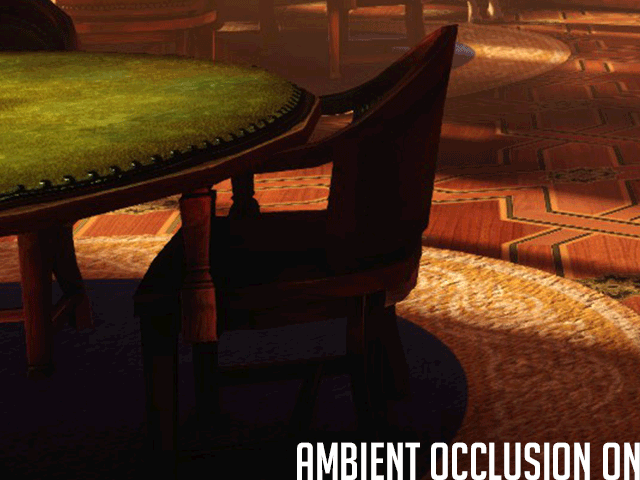
Ambient Occlusion creates realistic shadow transitions between different physical objects. Ambient occlusion in-game, while noticeable, will not dictate the shadow quality. This is why ambient occlusion is usually a separate option from shadow quality.
Instead, ambient occlusion will lighten or darken shadows in relation to other objects. In the example below, ambient occlusion darkens the shadow underneath the table to create a more realistic lighting effect in the room.
In a lot of cases, you probably won’t notice the effect too much. It makes light more realistic, but won’t blow you away with additional detail.
8. Anisotropic Filtering
Filtering allows games to smoothly transition between high-quality textures near the player, and low-quality textures farther away, where you can’t see them as clearly. A sudden change from clear to blurry looks terrible, so filtering is important.
Anisotropic filtering reduces the amount of texture blurring at far distances. These anisotropic filtering effects are best seen at oblique angles (angles that indicate far distances) rather than directly in front of your character.
Before anisotropic filtering, bi or tri-linear filtering was common. This type of filtering slowly degrades texture quality over distances. Anisotropic filtering, on the other hand, replicates similar texture quality at close and far distances alike.
You can see a sample below. Using it is not too demanding on your hardware, and many games nowadays even enable it by default so you don’t have to adjust it.
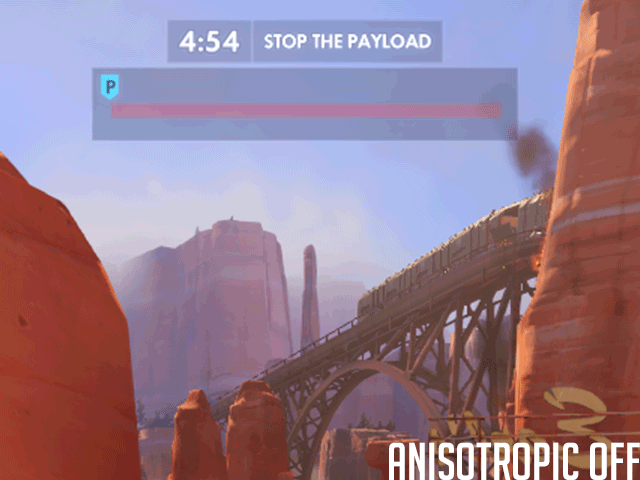
It may appear as though anisotropic filtering lowers shading effects at far-off distances. That is due to reduced blurring, which reduces the dark spots created with smoke and texture effects.
9. High Dynamic Range (HDR)
While it isn’t typically a setting you can change, HDR is an important graphical term you should know. Essentially, HDR improves the contrast between light and dark portions of your display. This makes the dark parts look darker, and the bright parts look brighter.
You’ll need an HDR-capable display to take advantage of it, so you might want to shop for an HDR monitor when it’s time to replace yours.
10. Bloom
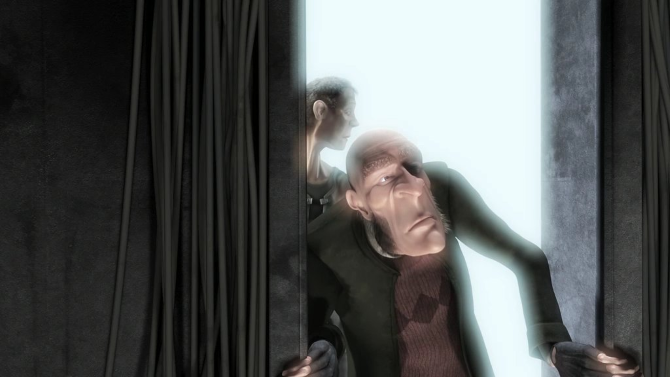
Bloom is an effect that attempts to make light in games “feel” brighter. Of course, your display can only get so bright, so bloom uses other visual methods to increase the effect. You’ll notice bloom when you see light spilling over the edges of objects, like characters and walls.
It’s supposed to replicate the feel of extremely bright light overwhelming your eye or a camera. Used in moderation it can be effective, but some games go overboard with it.
11. Motion Blur
This is a straightforward graphical effect. Motion blur introduces fuzziness to the image when rotating the in-game camera. Like bloom, it’s typically used for cinematic effect, as it mimics similar properties seen in movies.
Many people prefer to turn motion blur off, as it reduces the quality and adds to natural blurriness.
12. Field of View
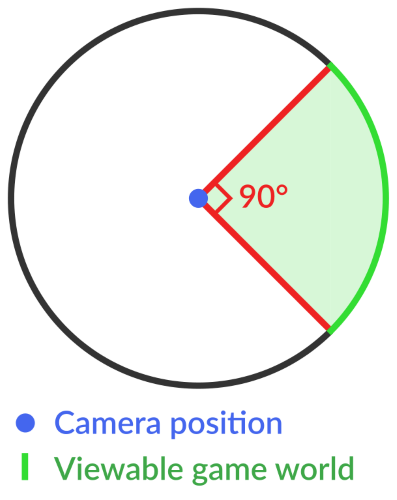
Field of view, often abbreviated to FOV, defines how wide of an angle your character sees in a first-person game. Increasing this lets you see more of the world at once (essentially enhancing your peripheral vision), but can make aiming more difficult as it squishes more information into the same screen size.
Generally, you should increase the FOV to a level where you can see as much as possible, without it affecting the rest of your gameplay.
Using AMD Radeon Settings and Nvidia Settings
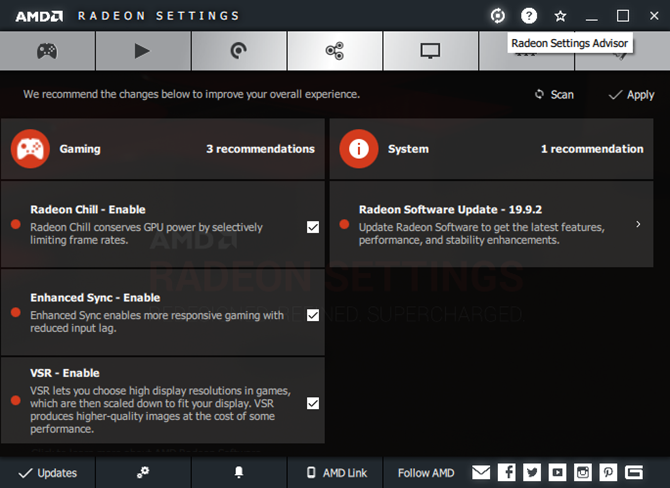
We’ve generally looked at settings you can adjust in individual games. However, you can also change many of these in your graphic card settings menu. Open the Nvidia or AMD app on your computer, and you can adjust some of them on a global level.
Whether you change them in-game or through your video card app, all of these (and more) graphical settings can be difficult to manage. If you don’t want to play around with them on your own, both Nvidia and AMD provide tools to optimize games for your available hardware.
Inside AMD’s Radeon software, you’ll find three AMD Radeon Advisor tools. You can run Game Advisor inside any game to get suggestions for better performance. Settings Advisor scans your system and provides recommendations based on your setup. Finally, the Upgrade Advisor will help you determine if you can play a particular game.
If you have an Nvidia GPU, Nvidia GeForce Experience provides similar functionality. You can use it to automatically apply the best balance of quality and performance for many games.
How to Get the Right Gaming PC Setup for You
Now you have a basic grasp on what PC graphics options mean and how they affect your game. In general, the more powerful hardware you have, the further you can afford to crank up these settings for a prettier game.
If you’re lost, try using the assist tools we mentioned above. Otherwise, a little experimentation can help you strike the best balance between performance and visuals. You definitely want your game to look pretty, but you shouldn’t sacrifice a smooth experience for looks. This is especially important in fast-paced multiplayer games.
To help you get the best results, here are the ways to optimize your PC for gaming.
Read the full article: Video Game Graphics and Settings Explained
from MakeUseOf https://ift.tt/2B3gkc6
via IFTTT

0 comments: