Next time you need to take a quick note on your computer, forget the pen and paper. You can use the Windows 10 Sticky Notes app to jot down information easily.
Here’s how to use Sticky Notes in Windows 10 to record your thoughts for later use.
How to Get Sticky Notes on Windows 10
Sticky Notes is a built-in app for Windows 10 users. To launch it, click the Start button or press the Windows key to open the Start menu. There, type “sticky notes” and select the Sticky Notes entry that appears. This will open the program with one blank sticky note.

If you can’t find Sticky Notes on your computer, you can install the Microsoft Sticky Notes app free from the Microsoft Store.
Once it’s open, you may want to right-click the icon on your taskbar and select Pin to taskbar for easier access in the future.
Creating Desktop Sticky Notes in Windows 10
To create a new note using your newly pinned icon, right-click the Sticky Notes icon in your taskbar and select Add Note. You can also create a new note by clicking the Plus (+) icon at the top-left of any note. The keyboard shortcut Ctrl + N also works, as long as you have the Sticky Notes app in focus.
At the time of writing, the Sticky Notes app creates a separate window for each note you create. If you like to have a clean desktop, we recommend creating a separate virtual desktop for sticky notes.
To do this, press Win + Tab to open the Windows 10 Task View. At the top, click on the New desktop option.

Now you can use the Ctrl + Win + Left/Right keyboard shortcut to easily switch between desktops. With your sticky notes on a second desktop, they won’t clutter up your primary workspace.
You can move existing notes by opening Task View, then dragging the Sticky Notes window(s) to the new desktop at the top.
Using Sticky Notes on Windows 10
While its simple interface may imply a barebones feature set, Sticky Notes actually has a few handy features to discover.
Formatting Sticky Notes and Keyboard Shortcuts
When not in focus, the menu bar on your note will collapse. Click a note to show a bar at the top with some options, plus formatting tools at the bottom. These include standard text options, such as bold and bullet points. You can also use the Images button to add a photo to your notes.
Instead of using the mouse, Sticky Notes offers several familiar keyboard shortcuts to access these options faster. Below are the basic text formatting shortcuts that Sticky Notes supports:
- Bold: Ctrl + B
- Underline: Ctrl + U
- Italics: Ctrl + I
- Strikethrough: Ctrl + T
- Bullet: Ctrl + Shift + L

Sticky Notes also supports other common Windows keyboard shortcuts for ease of use, like copy, paste, undo, and redo. Some of these include:
- Ctrl + W to close the current note
- Ctrl + D to delete the current note
- Ctrl + H to open the Notes list
Sticky Note Movement and Customization
When the Sticky Notes app is in focus, you’ll also see a bar along the top with a few controls. You can click and drag on this to reposition your sticky notes. Stacking them, for example, will save space on your desktop.
Like most other app windows, you can click and drag from an edge to resize them.

Click the X at the top-right of a note to close it, which does not erase it. Select the three-dot options button, then click on the menu icon (three dots) to choose from several colors for your note. From this menu, you can also delete the note for good or access the Notes list, which we’ll cover shortly.

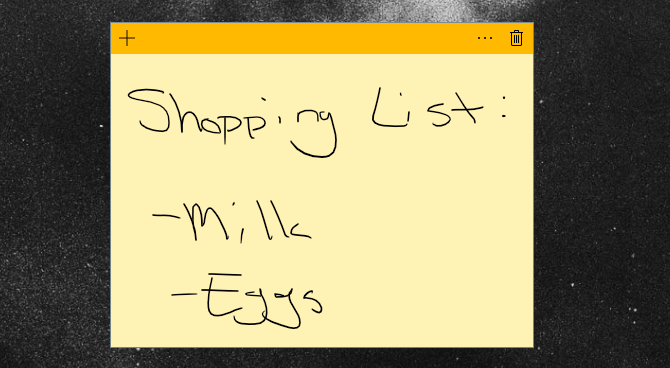
If you have a touch-compatible interface, you can use your finger or stylus to write on Sticky Notes. Feel free to draw or sketch on your note using your touchscreen or tablet as you would on regular paper.
Using the Sticky Notes List
The final item on the Menu, which you can also access with the Ctrl + H shortcut, is the Sticky Notes list page. This is a hub for all your current Windows sticky notes, including ones you’ve closed.
Double-click one to open it, or right-click to delete a note you no longer need. You can also use the Search box at the top to scan the content of all your sticky notes.
Meanwhile, click the Settings gear at the top to open the few options that Sticky Notes offers. Choose Enable insights to turn on useful content recognition in Sticky Notes. You can also change your theme and disable the deletion prompt.

As the top, you can make sure you’re logged into your Microsoft account for syncing notes to other devices, which we’ll examine shortly.
Using Insights in Windows Sticky Notes
With insights enabled as mentioned above, you can enable enhanced functionality in your sticky notes. Let’s see how this works.
Note: In our testing, some of the insight features worked (phone numbers, addresses), while others didn’t (stock symbols, reminders, flights). We include a full explanation of them here, but keep in mind that these features may not work properly depending on your Cortana settings.
Integrate Sticky Notes and Reminders
Below is a simple reminder typed into a note with insights enabled:
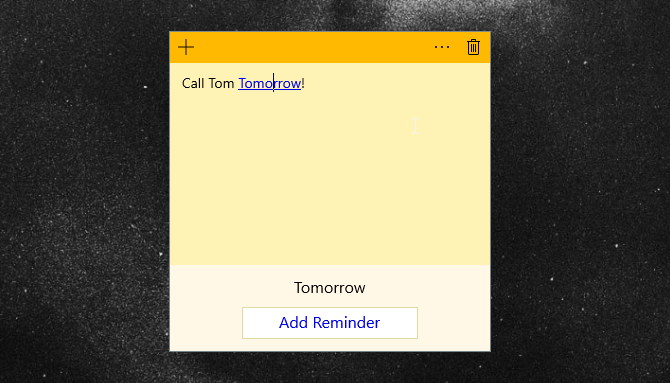
When you type (or write) a date like this, it will become a link automatically. Click this link text to activate the insight; you’ll see a prompt to Add Reminder at the bottom of your note.
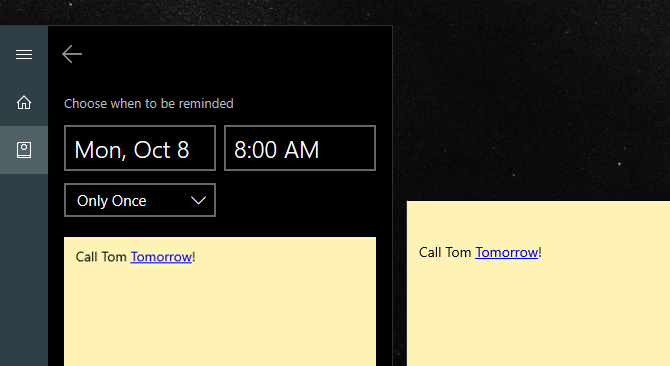
Hit this to set up your reminder with Cortana. Once you’ve entered the date and time, choose Remind and you’re all set.
Other Sticky Notes Insights
Sticky Notes on Windows 10 offers other insights to access information directly from your notes. Here are several options:
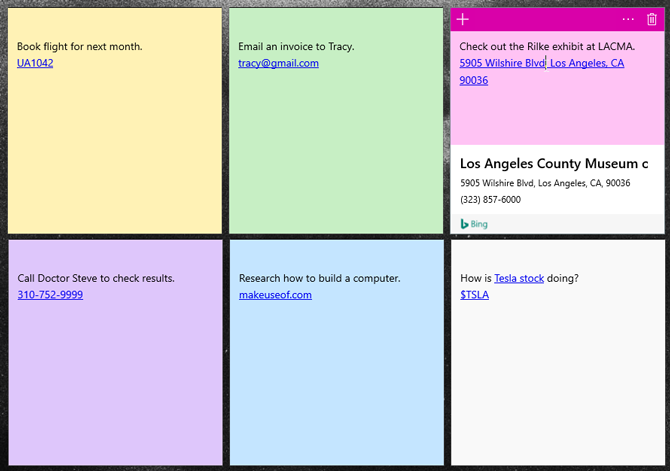
From top-left to bottom-right, these are:
- Check flight numbers, such as an upcoming flight. They begin with two letters, followed by a sequence of numbers.
- Send to an email address using your default email app.
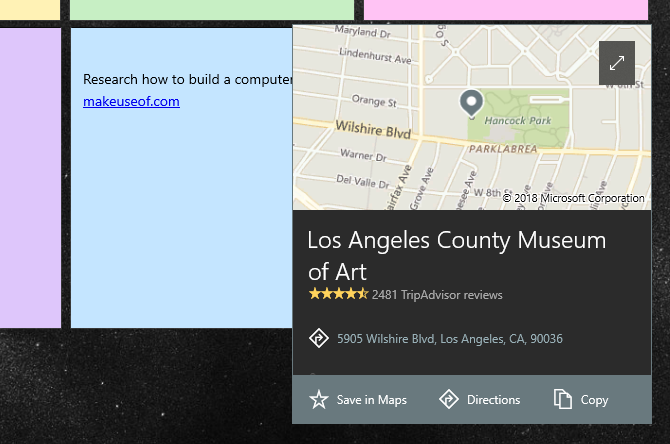
- View a location by pasting the address into your note. Click on the following prompt to get directions to the location in Maps.
- Paste a phone number into your note to call the number from your desktop via Skype or other compatible apps.
- Paste a link into your note to save it for later.
- Enter stock symbols using the $STOCK format to check prices.
To view the available options for each of these, click the link text and then follow the prompt at the bottom of the note.
Access Windows Sticky Notes on Mobile or Web
Need to work with your Windows sticky notes on other devices? Thanks to free mobile apps and a web interface, your sticky notes aren’t locked into Windows 10.
Head to the OneNote Sticky Notes page to access them online from any browser, even on a Mac or Linux system. Sign in with the same Microsoft account you use for Windows 10, and you’re all set.
Here you’ll find a simple interface that lets you read, edit, and create new notes. Any changes you make here will sync to Sticky Notes on Windows 10.

To access your notes on the go, you’ll need to install the free OneNote app for Android or iOS. Sign in with your Microsoft account, then tap the Sticky Notes tab to access your notes.
Just like the web and desktop, you can create new notes and make changes to existing ones. You’ll also notice the Camera icon at the bottom-left of a note, which lets you add images to them.
Transferring Sticky Notes to a New Computer
Using the above method, you can access your sticky notes on various devices. In case you want to move them manually or keep your own backup, you can copy and transfer the file they’re saved to.
First, head to the following directory:
%LocalAppData%\Packages\Microsoft.MicrosoftStickyNotes_8wekyb3d8bbwe\LocalStateThere, locate the file labeled plum.sqlite and copy it to a safe place. To move your notes to a new PC, place (or replace) this copied file into the same folder on that computer.
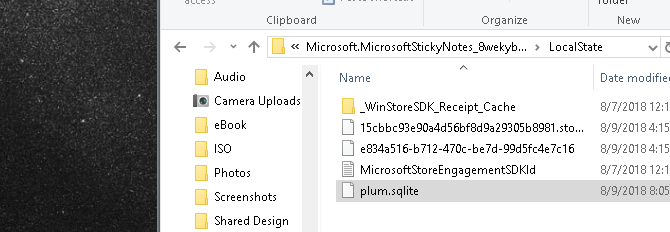
If you want to create a duplicate copy of your sticky notes, simply duplicate the file and change its name. For example, you can copy and paste the plum.sqlite file and name it plum1.sqlite. Then if your notes disappear or become corrupted, just rename the backup file to plum.sqlite again to restore it.
Need Something More Advanced? Try OneNote!
You might not know about all the useful functionality hiding in Sticky Notes for Windows 10. While it’s not the most full-featured program, it’s great for jotting down a quick thought or important bit of information.
If you need a more robust note-taking experience, Microsoft OneNote is a great free option. Check out our full OneNote guide for an overview. If that doesn’t click, follow our checklist to finding the perfect note-taking app.
Read the full article: How to Get Started With Windows 10 Sticky Notes: Tips and Tricks
from MakeUseOf https://ift.tt/2PefcYp
via IFTTT


0 comments: