macOS has some really great pre-installed apps, but not all of them are well-known. The Image Capture app is a case in point. If you’ve ignored it so far, it might be time to fix that and see how useful Image Capture can be.
Let’s explore four common tasks this modest app helps you perform.
1. Import or Delete Photos From External Devices
Yes, you can import photos from iOS devices, cameras, or SD cards to your Mac with iTunes or Photos. But if you’re having trouble with these apps or if you would prefer an app with a simpler interface, try Image Capture. It works with videos too.
After you plug the source device into your Mac and open the Image Capture app, you can:
Import Photos Directly to a Folder
First, use the Import To dropdown menu to specify the Finder folder where you want the imported photos to show up.
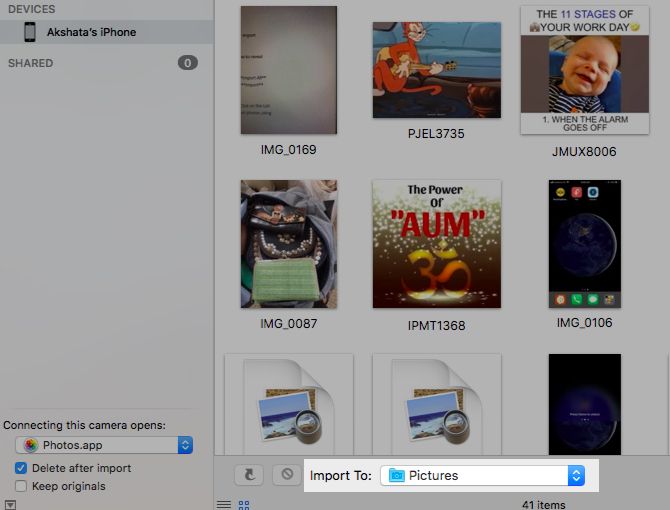
Next, decide if you want Image Capture to automatically delete photos from the connected device after import.
If yes, select the Delete after import checkbox in the sidebar. Is the checkbox missing? Click on the tiny icon at the bottom left of the app window to reveal it. (The icon resembles a square with an upward-pointing arrowhead within it.)
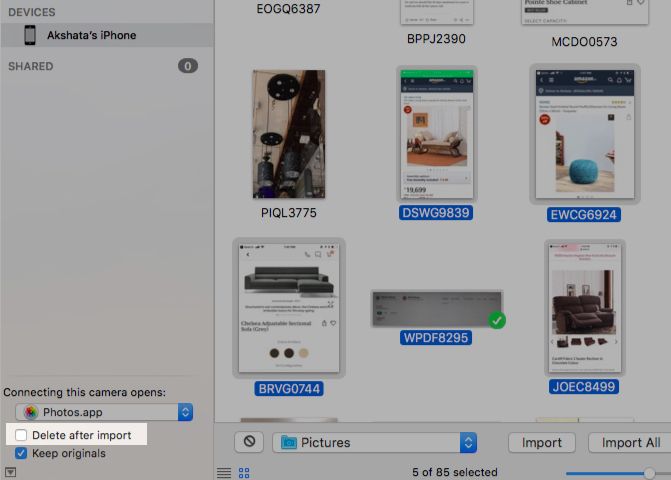
Now, if you want to import the entire camera roll from the connected device, click on the Import All button. Otherwise, select the thumbnails of the photos you want to grab and click on the Import button.
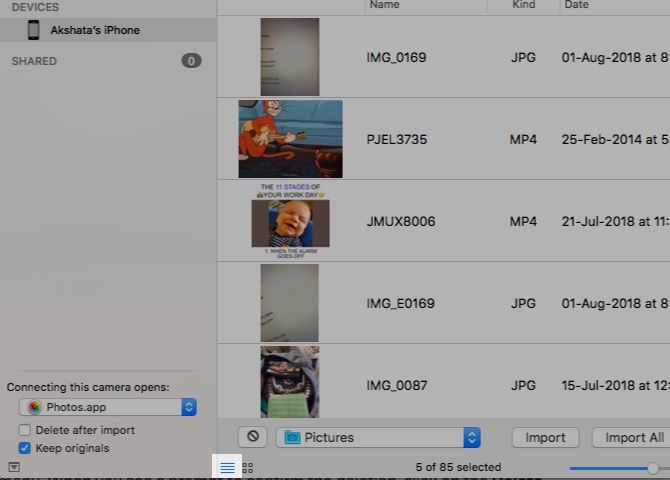
If you have trouble finding the photos you want, here’s a way to make your search easier: click on the List View icon to the right of the sidebar at the bottom of the app window. This view lets you sort photos using various criteria such as Kind, Date, File Size, Width, and Height.
Delete Selected Media in Bulk
Select the photos you want to delete from the external device and click on the Delete icon (circle with a slash through it). You’ll find it to the left of the Import To dropdown menu. When you see a prompt to confirm the deletion, click on the Delete button within it.
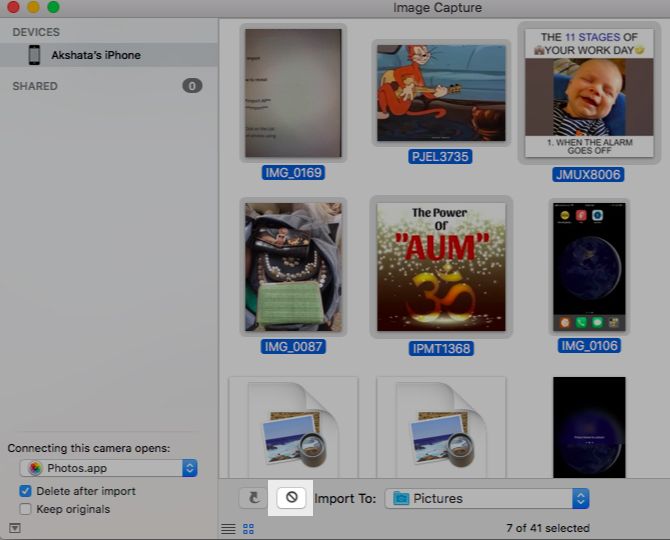
You can’t use this delete process if you have enabled iCloud Photo Library. You’ll have to use the Photos app only. With cloud sync enabled, the delete icon will appear grayed out or be missing altogether from the Image Capture app.
A Word About Image Formats
The images on your iPhone save in the new High Efficiency Image Format (HEIF). But when you view them in Image Capture, they’ll appear as JPEGs or PNGs and import as such.
Want to import the images in the original format? You’ll have to go to Settings > Photos > Transfer to Mac or PC on your iPhone and switch from the Automatic option to Keep Originals.
It’s best to test the import function with a dummy photo or two before you import photos (and videos) in bulk. This way you can be sure that what you’re seeing is exactly what you’re importing.
Also, once you get familiar with your Mac’s Automator app, you can weave the Image Capture plugin into an automation workflow. This will allow you to, say, automatically rename imported photos or back them up to a cloud service.
2. Create Contact Sheets

If you want to take a closer look at a few of the photos stored your device, displaying them together on a contact sheet is quite useful. You can generate one without leaving the Image Capture app. All you have to do is:
- Select the photos you want to include in the contact sheet.
- Click on MakePDF from the Import To dropdown menu.
- Click on the Import button.
If you aren’t happy with the layout of the contact sheet, you can select a different preset from the Layout menu. Click on Layout > New Layout if you want to create a new customized layout.
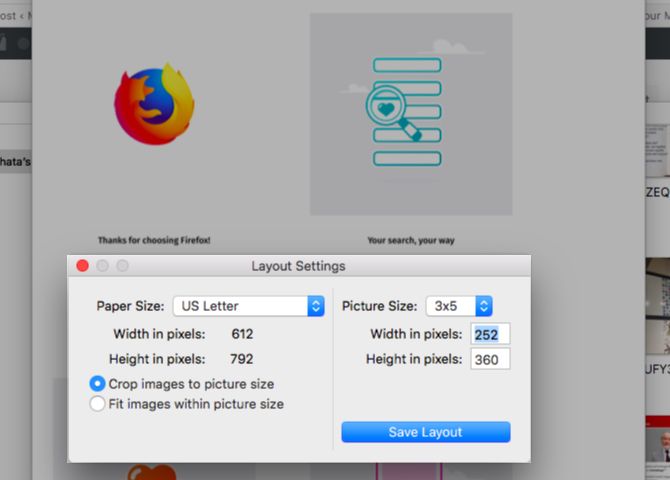
To zone in on the details of individual photos using Preview, you can save the contact sheet as a regular PDF file.
More “Import To” Options
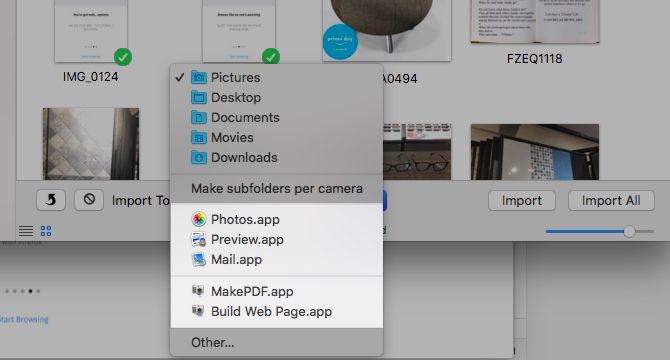
You might have noticed a Build Web Page option in the Import To dropdown menu while creating the contact sheet. You can use it to display selected photos as thumbnails on a webpage instead of a contact sheet. Clicking on a thumbnail toggles its full view.
The Photos, Preview, and Mail options in the dropdown menu are also pretty useful. Photos and Preview let you edit imported photos on the fly. And with Mail, you can attach selected photos to a new email directly.
3. Scan Documents
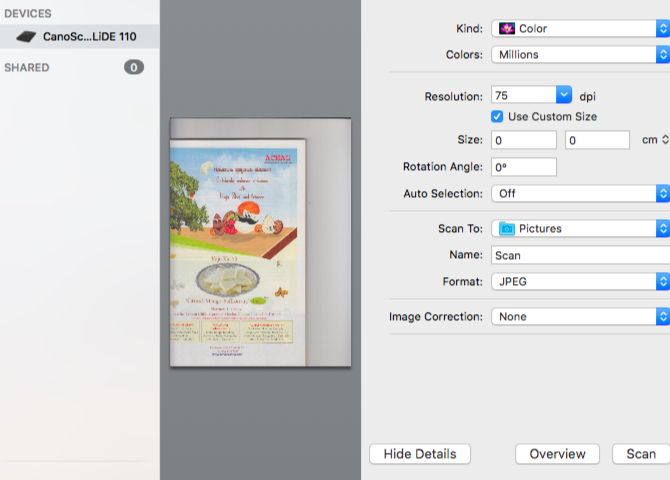
Scanning documents with the Image Capture app is usually a straightforward process. You don’t need the software that came with your scanner, as your Mac installs the latest scanner software automatically.
When you connect a scanner to your Mac, you should find it listed in the Devices section of the Image Capture app without any work on your part. But in some cases, you might have to set it up via System Preferences > Printers & Scanners. Once your scanner is up and running, it’s a matter of hitting the Scan button to scan your documents and images.
Want to change the image format or auto-select elements in the scanned image? You’ll need to access scan settings by clicking on the Show Details button to the left of the Scan button.
4. Assign New Default Apps for Connected Devices
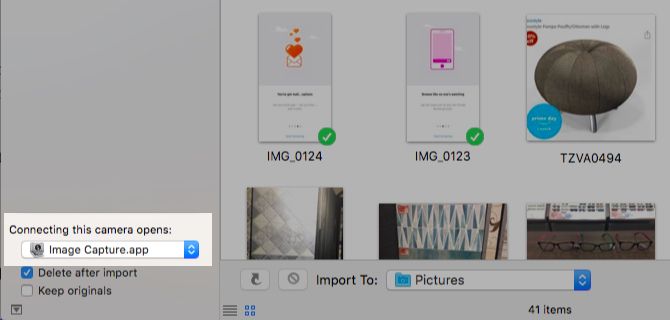
If you’re tired of having the Photos app pop up every time you connect your iPhone, you can prevent the app from appearing in future. All it takes is setting the Connecting this [device] opens dropdown menu to No application.
That’s not all. You also get to match external devices with new default apps from this dropdown menu.
For example, if you want Image Capture to open automatically when you plug in your iPhone, select Image Capture from the menu options.
Do you want to import media automatically from an external device every time you connect it to your Mac? Select the AutoImporter from the dropdown menu in that case. You’ll find the imported images in a subfolder within your Pictures folder at /Users/[Your Username]/Pictures.
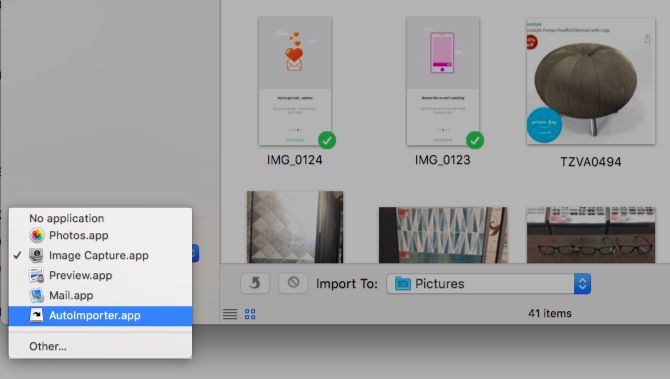
Of course, to assign an app default for a new device, you’ll have to plug the device into your Mac at least once.
A Simple and Useful Native Mac App
While Image Capture is not one of those must-have Mac apps, it’s useful in its own quiet way. Though you’ll probably only open it when you need it, you’ll be glad it’s there.
By the way, it’s not the only lesser-known tool worth a look. You might also want to explore these other in-built Mac tools for everyday tasks.
Image Credit: simpson33/Depositphotos
Read the full article: 4 Practical Ways to Use Your Mac’s Image Capture App
from MakeUseOf https://ift.tt/2OReMIc
via IFTTT

0 comments: