Running a website or a blog can be fun, but offering a way for visitors to contact you isn’t always easy or straightforward. Thankfully, Google offers a perfect website contact form solution: you can embed a Google Form on a page and collect all comments from your readers in a Google Sheet.
It’s straightforward to set up, so if you’re ready to create an enhanced contact form for your website, let’s get started!
Creating Your Contact Form in Google Forms
Google actually offers a pre-made “Contact Information” form in the templates gallery when you first log into your Google Forms account.
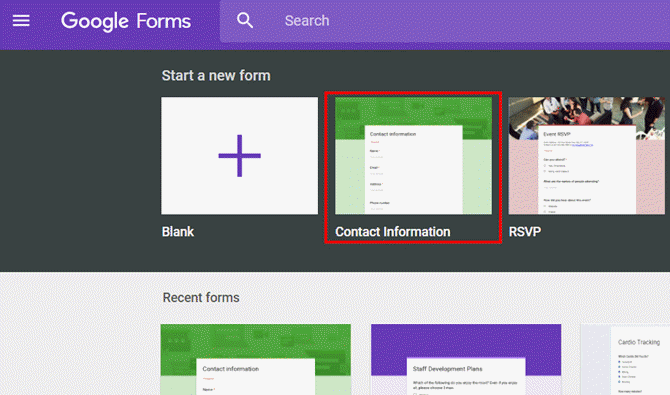
The form asks for standard information like name, address, phone number, email address, and a field for the user to type in their comments.
You can customize this form by changing what information you’re asking for.
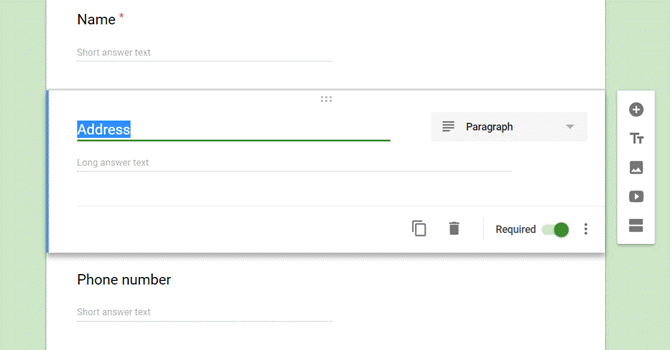
You can also change whether or not that information is required.
If it’s not required, then the user can leave that field blank. If it is required, then the user can’t submit the form until they’ve entered something into that field.
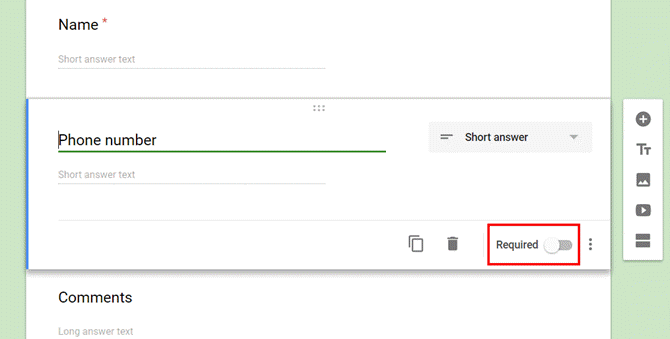
Since you’re using this form as your website contact form, you want to make sure that the user has actually entered something into the comments field. So make sure you’ve set that item to Required.
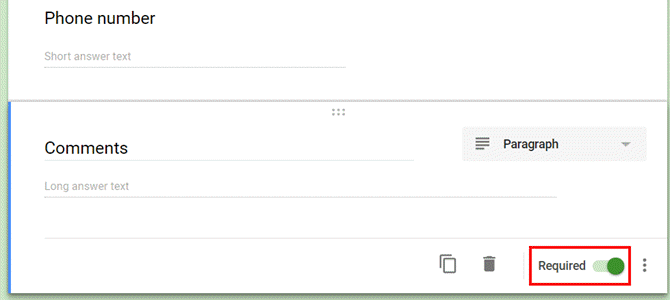
Now that you’ve customized the content of Google’s Comment Form template to suit your needs, it’s time to customize how the form behaves when your users actually use it.
Setting Up Your Website’s Contact Form
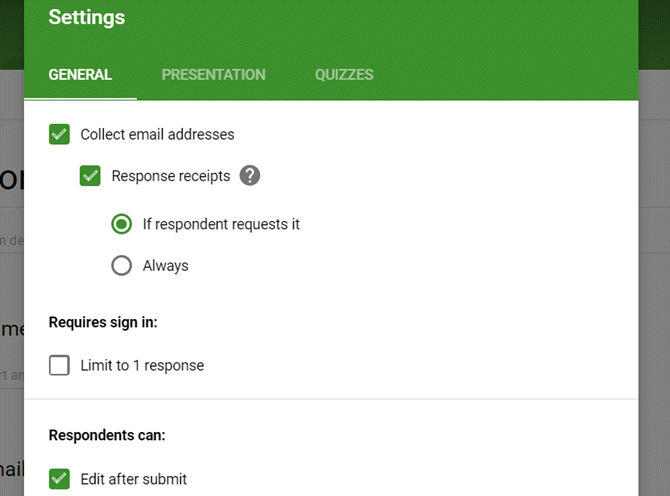
If you click the Settings icon, in the General tab, you can control how this form behaves when people submit it from your website.
For example you can have the form send a duplicate of the user’s answers to the email address they provided.
You can also enable or disable their ability to edit their answers after they’ve submitted them.
Under the Presentation tab, you can customize the response your users will see after they submit the form on your website.
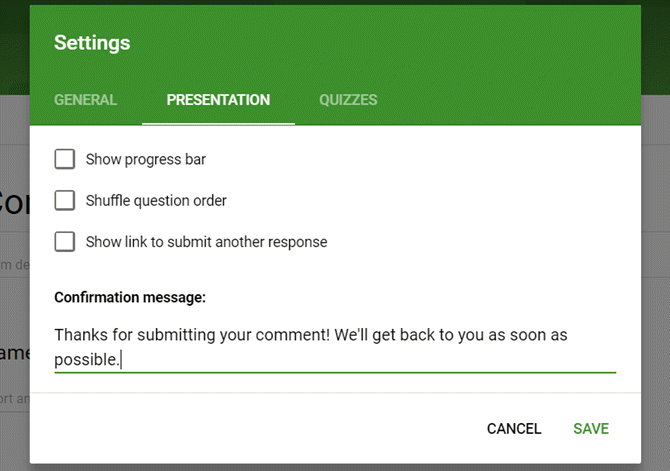
Make this something meaningful, since it will be displayed to every visitor who submits this form.
For example, it’s good to let them know roughly how long they’ll have to wait for a response (you could even provide a phone number here if they need a more urgent response).
It all depends on how you’re using the form and what kind of contact you want to provide to your visitors.
Finding the Embed Code
Now that your form is ready, it’s time to embed it onto your site.
The first step is to get the embed link for your form. It isn’t very straightforward, because there’s no embed icon displayed directly on the form editor page.
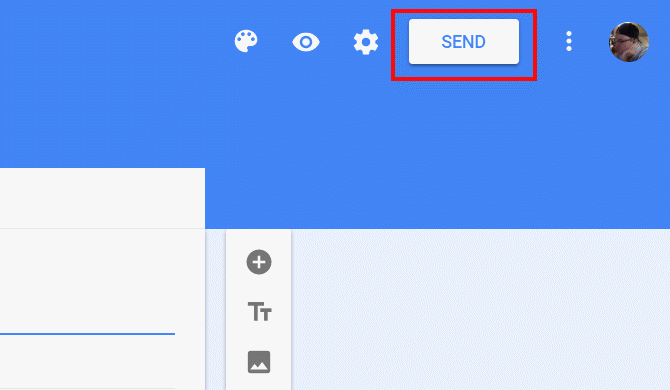
To access the embed code, you have to click on the Send button at the upper right of the form editor.
This page displays the HTML embed code you’ll need to copy and paste into your site. It’s important to set the right width and height settings here so the embedded form fits well into the destination page.
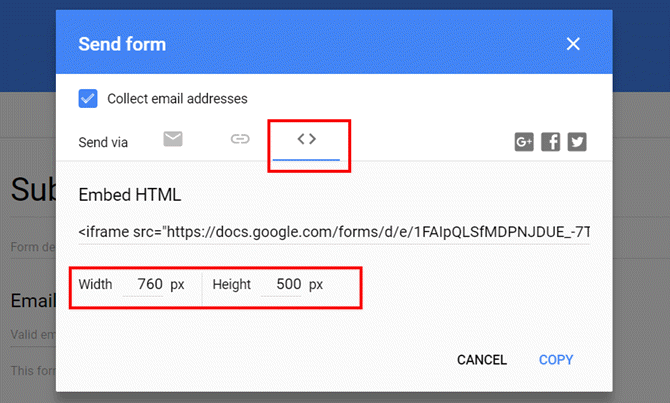
You may need to play around with a few sizes, but don’t worry. You can always come back here, change the size, and then copy and paste the new embed code again.
Embedding the Contact Form on Your Website
If you have a website or a blog, the standard approach is to create a Contact menu item in your header. This makes it as convenient as possible for visitors to contact you.
Some sites use an alternate approach, like placing this link in the footer, or even on the About Us page.
On my site, the Contact menu item moves the view down to an area after the Testimonials. This is where I want to embed my contact form.
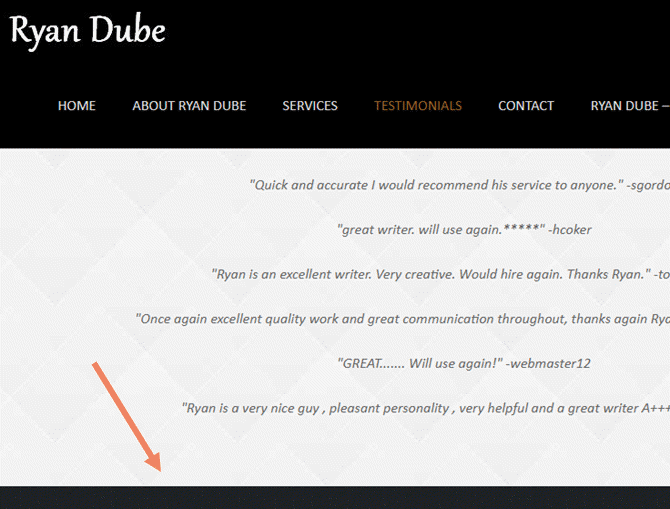
If you’ve custom written your own website from scratch, then you’ll want to insert the embed code directly into the section of the page where you want it to show up. When you take the manual approach, make sure you avoid common mistakes people make when building a web page.
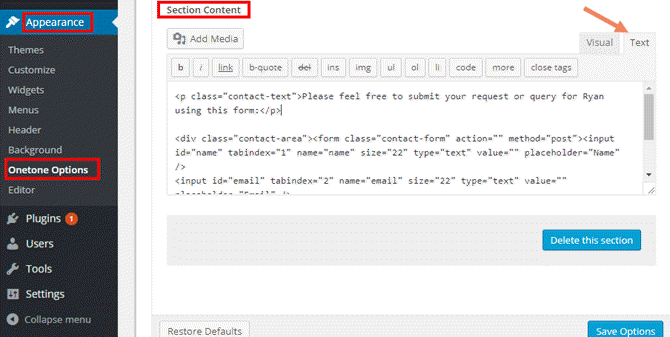
With a WordPress site, the theme you’re using will usually have an area with a contact form that you can customize. For example, with the Onetone theme there’s a “Section Content” field on the main page that includes the existing contact form code.
You can highlight this code and replace it with your new Google Contact Form.
Why Using a Google Contact Form Is Better
Why not just use the existing contact form that comes with a theme? There are actually several reasons using Google Forms is better:
- PHP forms usually use POST or SMTP to send email, and in both cases you need to know how to configure the email server so it works.
- Instead of sending comments to email, the Google Contact Form collects all messages to a Google Sheet. This prevents inbox clutter.
- You can modify the form at any time using the Google Form GUI rather than having to edit any code.
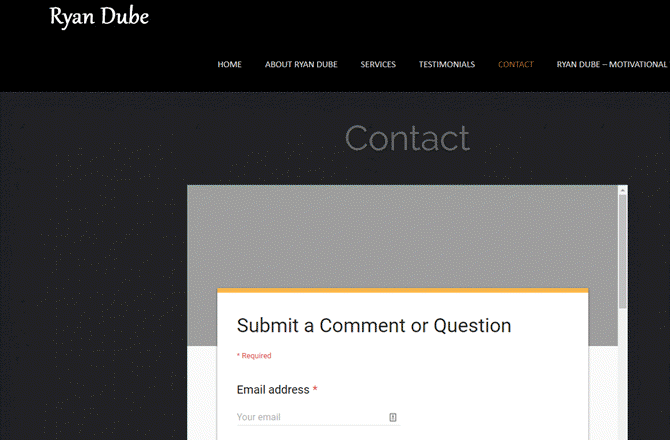
Once embedded into the web page, your contact form will look something like this.
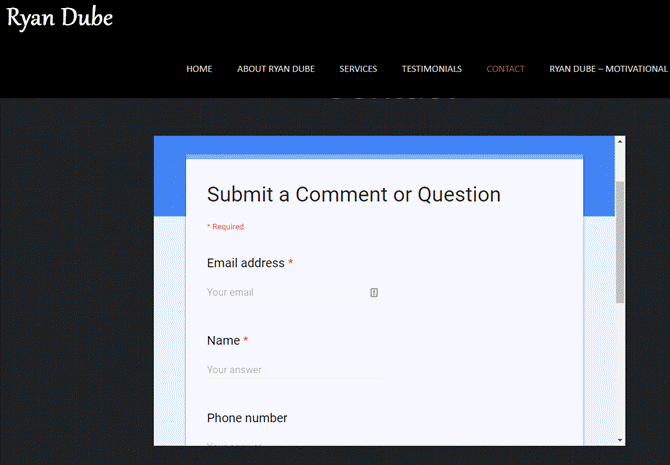
As you can see this first attempt isn’t perfect. The current coloring theme for the Google Form doesn’t quite blend well with the web page theme.
Time to tweak the Google Form design a little more.
Updating and Customizing the Contact Form
The beauty of this approach is that once it’s embedded on your site, you can redesign the form however you like without ever having to touch your web page again.
For example, to change the color scheme of the existing form, just go into the Google Form editor and click on the color palette icon in the upper right corner.
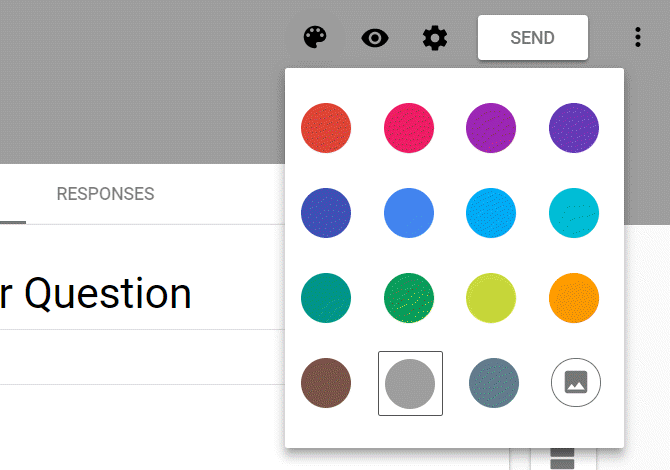
Since my site has a darker black-based theme, a gray contact form theme should blend nicely.
The moment you save the new Google Form in the editor, it updates the form on the website, as you can see here.
Now that the design and embed is complete, it’s time to test whether the contact form actually works as desired!
Testing Your Google Contact Form
You should always go through a test run of any new form you place on your website.
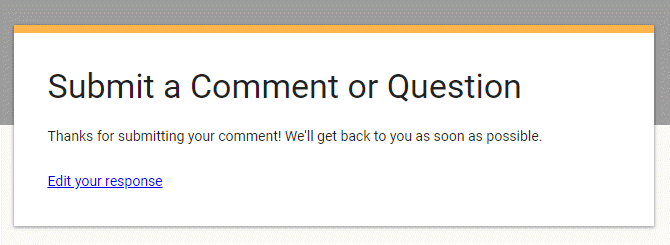
In this case, the Google contact form responds with the custom response text you defined when you designed the form.
You can access all of the comments from your visitors on the same page where you designed the form.
Just click on the Responses link at the top of the design form.
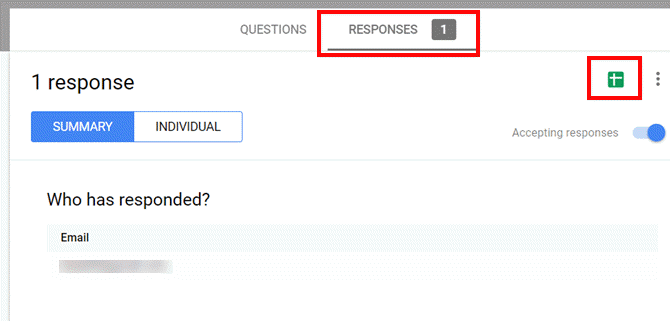
Here you can see individual comments and contact info from users. You also have the option to click the Google Sheets icon in the upper right corner of the window. This will create a new Google Sheet to store all of the incoming comments from users.
Choosing how you view incoming user comments really depends on how you plan to process them. If you’re hoping to create some Google Script automation whenever there’s a new incoming email, then Google Sheets is the way to go. We’ve covered many ways you can use Google Script to automate Google Sheets.
However if you just plan to manually respond to every new incoming comment, then you’re probably fine just using the display inside of the Google Forms editor page.
If you ever do want to save comments in a spreadsheet format, there are several options available. Just click the three dots icon on the upper right of the Responses view to see them.
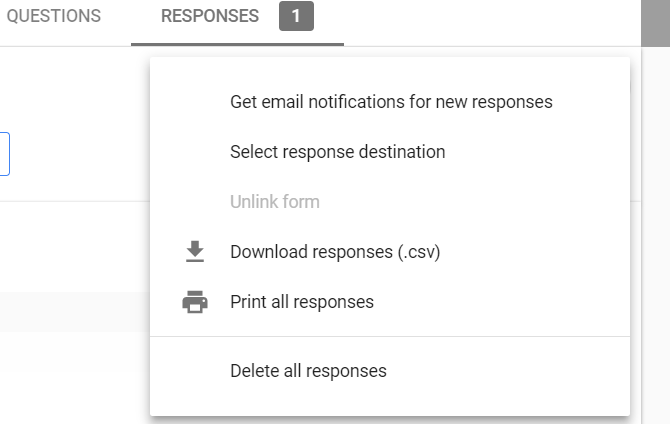
You can download all responses in CSV format, or even output them to your printer or to a PDF document. This is also where you can configure notifications whenever a new comment comes in from your website.
Take Your Google Forms to the Next Level
Using Google Forms to process comments gives you a lot more flexibility and functionality than using a standard web form.
Without any coding on your part, comments are logged in a convenient sheet. You can enable or disable things like email notifications or whether comments can be edited after submission.
One drawback with this approach is that the embed uses an iframe, which inserts a scroll bar in the window.
But if you give your form a design that blends it in well with your theme, the scroll bar doesn’t look that bad. It’s also a fair tradeoff given the many features you’re getting in return.
If you’re just getting started with Google Forms, you’ll want to check out our extensive guide to Google Forms. There are also many great Google Forms add-ons that let you extend what you can do with it. You can even embed those enhanced forms in your website!
from MakeUseOf https://ift.tt/2Ho0XN1
via IFTTT

0 comments: